Use your dashboard
A dashboard is your personal page with favorite reports and models. You can organize your dashboards any way you want. For example: separate dashboards for sales reports, financial reports, key metrics etc (watch the introduction).
You can also watch the tutorial video.
A dashboard can contain multiple reports or models:
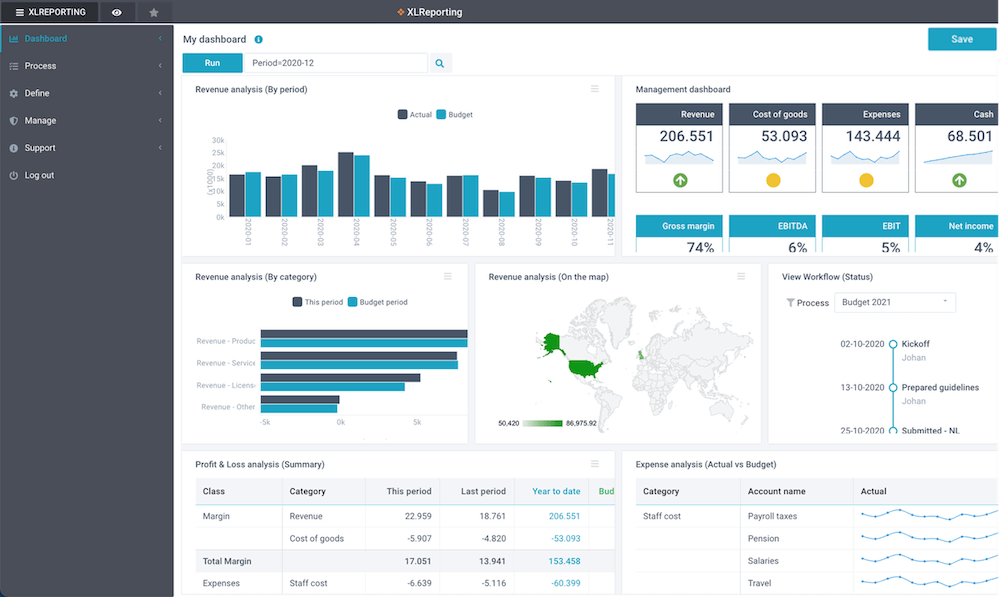
Each report or model is shown inside a widget: a small frame that you can drag and move, and change its position, width, and height on the dashboard page.
Create dashboards
You can create a dashboard in two ways:
- Click on Actions - Create new of an existing dashboard.
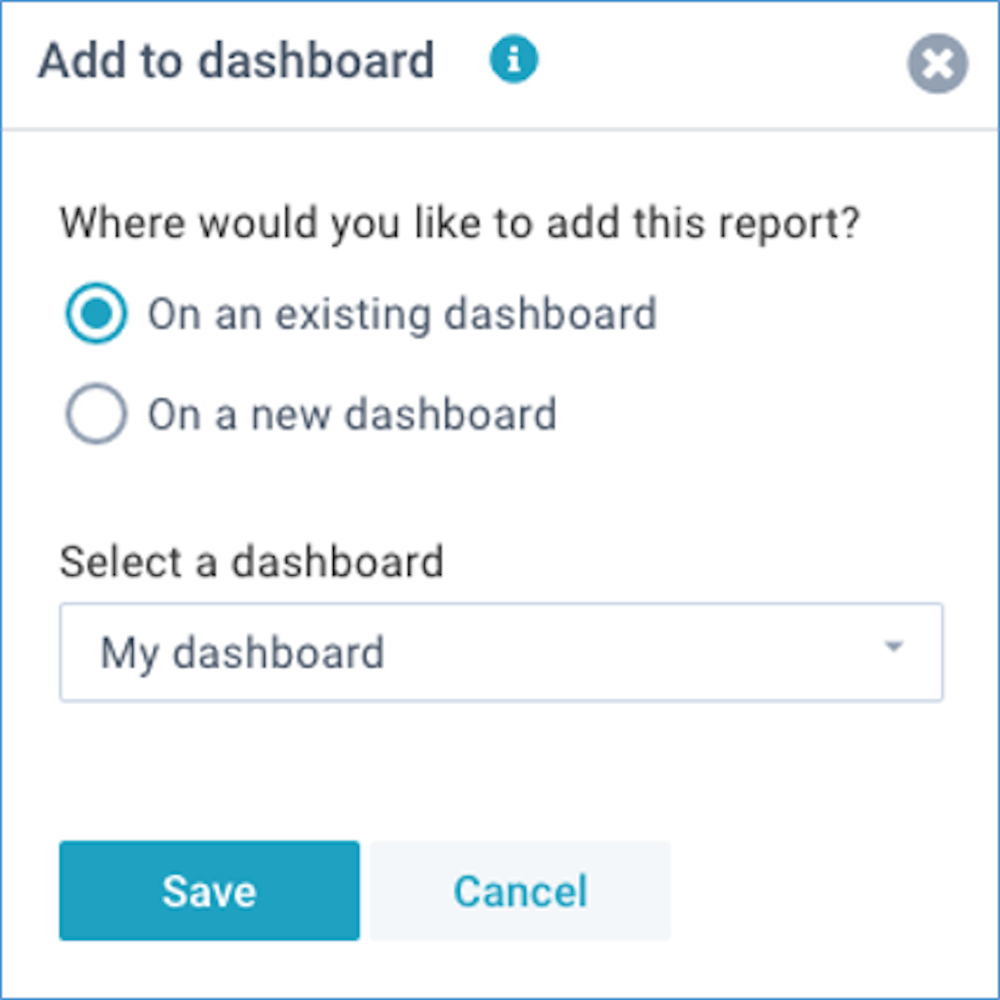
- Click on Actions - Add to dashboard when you run a report or model.
Either way, the rest of the process is the same, and you can enter a name for your new dashboard and add the first report or model. You can also easily copy a dashboard. You can add, move, or remove items on your dashboard at any later point in time.
Widgets
Every widget has a small ☰ icon in its right-top: you can move it around on your dashboard, change its display size, copy it to another dashboard, remove it, or run the report:
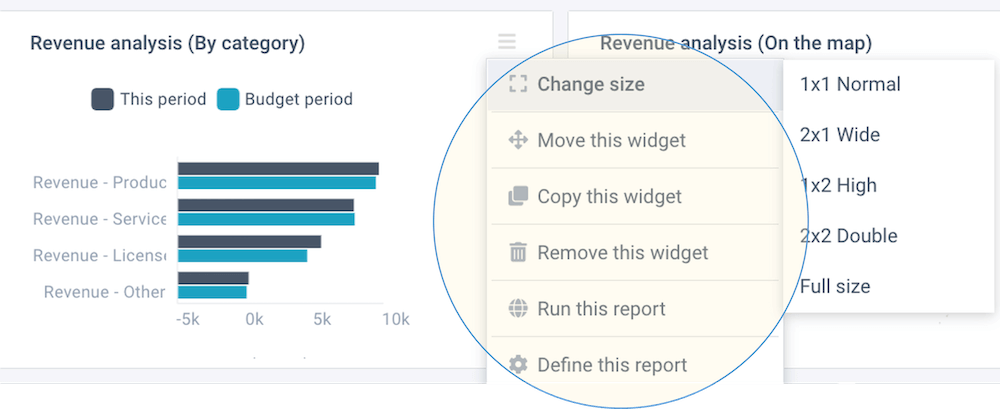
- The display sizes are relative sizes. It indicates the relative proportions that widgets can occupy on the same row.
- If you remove a report from your dashboard, you are not deleting the report (or model) itself, you are only removing it from this particular dashboard.
Actions
On your dashboard, you can use the Save and Actions buttons in the right-top of the screen:
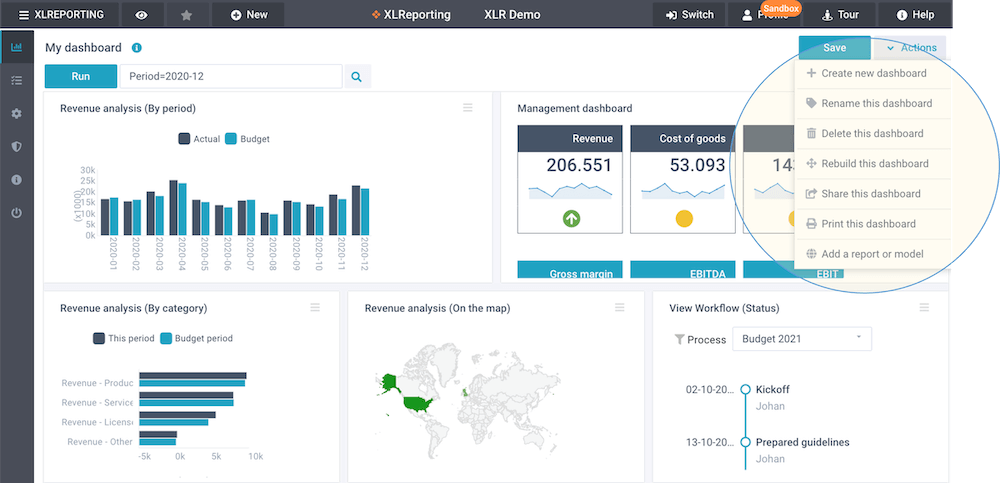
These buttons enable you to do the following:
- Save - save your changes (or Ctrl+S)
- Actions - open a dropdown menu with further options:
- Create a new dashboard
- Rename this dashboard
- Delete this dashboard
- Arrange this dashboard
- Share this dashboard
- Print this report
- Dashboard pages are complex web pages. If you want to export them to PDF, select Actions - Export PDF or print and then choose Print to PDF or Open PDF preview in the print dialog window of your browser.
- If you delete a dashboard, you are not deleting any of its reports or models, you are only deleting the dashboard itself.
- Dashboards are fully supported on mobiles, but all widgets will be shown underneath each other. You can simply scroll vertically through all widgets.
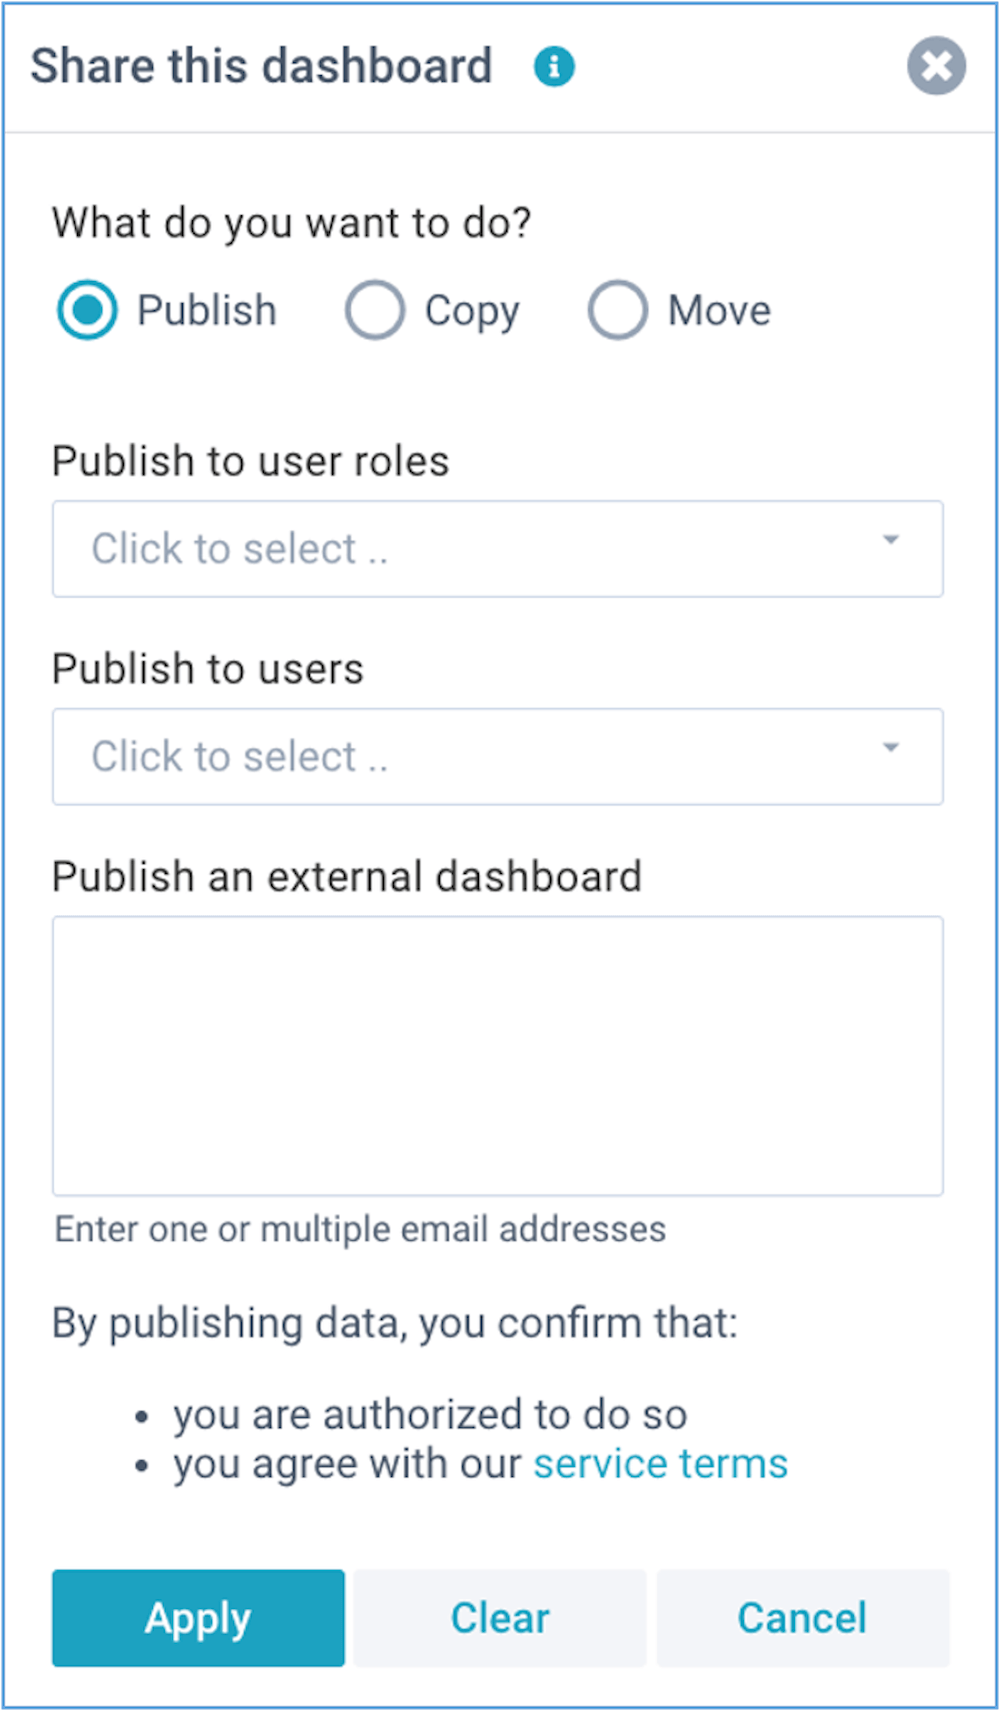
Share a dashboard
Once you created a dashboard, you can choose to share it to other users. There are various methods you can select:
- Share to user roles - select one or more existing user roles in XLReporting. All users that have been assigned these role(s) will see your dashboard in "view-only" mode whenever they are logged in. Anytime you change your dashboard, or when the report data changes, these changes are immediately reflected to these other users. The users can also opt to create their own personal copy of your published dashboard, which they can subsequently change to their own liking.
- Share to users - select one or more existing users in XLReporting. They will see your dashboard in "view-only" mode whenever they are logged in. Anytime you change your dashboard, or when the report data changes, these changes are immediately reflected to these other users. The users can also opt to create their own personal copy of your published dashboard, which they can subsequently change to their own liking.
- Copy to another user - select an existing user in XLReporting. This user will receive a copy of your dashboard and can use and change it independently from you. Effectively, it becomes his or her personal dashboard. Please note that this copy will not include any published settings.
- Move to another user - select an existing user in XLReporting. Your dashboard will be moved to the other user including any published settings. This user can change (including published settings) it independently from you, and this dashboard will be deleted from your account.
You can revoke users at any time by removing their names from the published list.
- The option to share dashboards must be enabled in user roles.
Layout
A dashboard page consists of one or more widgets. These widgets combine into a so-called "grid" consisting of any number of rows and columns. When you drag and move widgets, you're moving them to another location in this grid.
Dashboard pages can scroll both horizontally and vertically if needed to properly show the widgets.
When you set the size for every widget, you're defining the relative proportions that a widget can occupy. These relative proportions matter mostly when there are several widgets on a dashboard. There are 2 useful methods to help you arrange an optimal dashboard layout:
- Edit - Move this widget - by moving a widget to a separate row, in combination with giving it a larger size, you can use the full width of the screen.
- Actions - Arrange this dashboard - this arranges the layout of widgets on the dashboard, allowing you to choose how many widgets you want on each row.
Dashboards are fully supported on mobiles, but all widgets will be shown underneath each other. You can simply scroll vertically through all widgets.