Create | Settings | Permissions | Permits | Restrict | Restrictions | Actions | Review
Manage user roles
User roles define the access to all program features, objects, and data in XLReporting. You can create as many roles as you want, and then assign one or more role(s) to each user. User roles consist of 3 elements:
- Permissions - enable or disable access to program features.
- Permits - assign custom permits to define granular controls in models.
- Restrictions - restrict the data that users can view and save.
You can also watch the tutorial video.
Create user roles
You can create a user role in two ways (watch the tutorial video):
- Click on Define - New in the sidebar menu, or click the New button in the top of the screen.
- Click on the Actions - Create new button of an existing user role. This also enables you to make a copy of an existing group.
Either way, the rest of the process is the same, and you can enter a name for your new user role and define its settings:
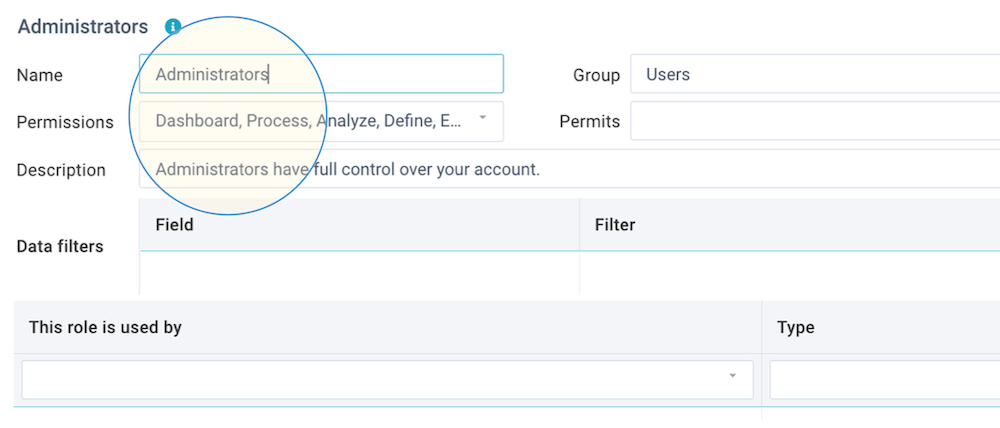
This page also shows all current users that have been assigned to this user role.
Settings
You can define the settings for the user role via these fields:
- Name - enter a name. This must be unique within all your user roles.
- Group - select how this user role is to be shown in the menu navigation.
- Active/locked - activate or lock a user role. When locked, the permissions of this user role (and therefore all users assigned to this role) are revoked.
- Permissions - enable or disable access to program features.
- Permits - assign custom permits to define granular controls in models.
- Description - enter an (optional) description. This is helpful to document your various user roles.
Permissions
You can enable or disable the access to every individual program feature:
- Dashboard - enable the Dashboard menu.
- Share dashboards - allow users to publish their dashboards to other users, or to copy or move them.
- Run reports - allow users to run reports.
- Change layouts - allow users to edit report layouts.
- Save layouts - allow users to save changed report layouts.
- Run models - allow users to run models.
- Save models - allow users to save data they entered into models.
- Import data - allow users to import data by running defined imports.
- Export data - allow users to export data from data sets.
- Edit data - allow users to manually edit the content of data sets.
- Define new - allow users to create new objects.
- Define reports - allow users to define reports.
- Define models - allow users to define models.
- Define imports - allow users to define imports.
- Define data sets - allow users to define data sets.
- Users - allow users to define other users (this is usually an administrator task).
- User roles - allow users to define user roles (this is usually an administrator task).
- Menu groups - allow users to define groups (this is usually an administrator task).
- Apply restrictions - this gives no permissions, other than that it enables you to define user roles with restrictions (data filters) only, without giving any further permissions (user roles without at least one explicit permission get access to all permissions).
- Edit tenant - allow users to edit your tenant company details, and view usage and subscription details.
- Manage clients - allow users to view your client tenants, and to manage (review, create and update) your defined objects, user roles, and users into your clients. This is only applicable if you are a XLReporting partner.
- Mark versions - allow users to set a version number on the current definition of an object.
- Support menu - allow users to contact the XLReporting support team through the Support menu (you may choose to disable this if you prefer to support your users internally within your own company).
- Copy templates - allow users to import objects from a template tenant. This can either be our demo templates, or your own templates if you are a XLReporting partner.
- Transfer objects - allow users to transfer objects between tenants by exporting and importing configuration files.
- Show console - allow users to access the console to debug objects. Read more about debugging.
- Edit scripts - allow users to define advanced scrips in data sets, imports, reports, and models. This is for advanced use, and this setting is disabled by default. Read more about scripts.
- Access API - allow users to access the API without going through the web application.
- Run AI assistant - allow users to run AI assistants on data sets, imports, reports, and models..
Permits
Permits enable you to define granular controls in models. You can assign permits (one or more custom codes) to user roles, and look them up using the PERMIT() function in your models. This function returns true if the user has been assigned the given permit (that is, if at least one of the roles that have been assigned to the user has this permit), else false.
In addition to entering just a name, you can also enter permits as "name=value". In that case, the PERMIT() function will lookup the value if the permit exists in at least one of the roles that have been assigned to the user.
This enables you to control what the user is allowed to do within the model, for example by locking or hiding cells, making certain calculations, disabling the save button etc. See the PERMIT function for more details.
Please note that permits are case-sensitive. Avoid using spaces.
Restrict roles
By selecting permission Manage users without Manage roles, you can create a user role with restrictions on the user roles that can be assigned. In that case, an additional field Restrict roles appears where you can select the user roles that are allowed to be assigned when managing other users.
This enables you to give restricted access to users, in terms of how they can manage other users. A concrete example is if you have roles "Define", "Manage", and "View", and you want to give a user the ability to create and edit users, but ONLY with "View" access.
Restrictions
You can select one or multiple restrictions (data filters) to restrict the data that users can view and save. The list of fields shows all your data sets with all their columns, and you can set a filter for each field:
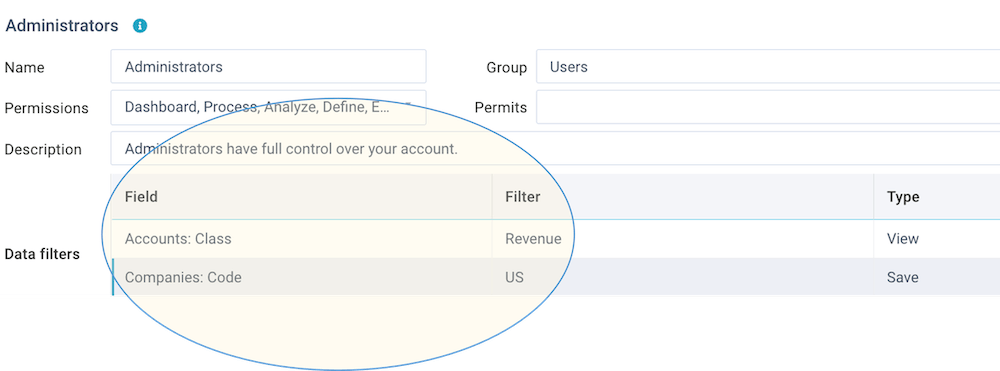
So in above example, users assigned to this role will only be able to view data that is limited to company "UK" and unit "100". Users with different roles can be given access to the same report, yet they would see differently filtered data, based on their role. This is a powerful feature that helps to segment and protect your information in a very simple way.
The Filter field can contain a single value, a range of values using ISANY() or BETWEEN(), or operators such as < and >.
The Type field designates what the filter is used for. You can define filters for view actions (run report, run model) and save actions (run import, save model).
You do not need to add anything to the definition of reports, imports, or models. The filters will automatically be applied when a user runs reports, models, and imports that relate to a data set for which you have defined one or more filters.
- Restrictions are applied when you are running (or defining) reports, models, and imports.
- Restrictions are not applied if you have Define data set permissions or when you are defining (or editing) data sets.
Actions
When defining a user role, you can use the Save and Actions buttons in the right-top of the screen:
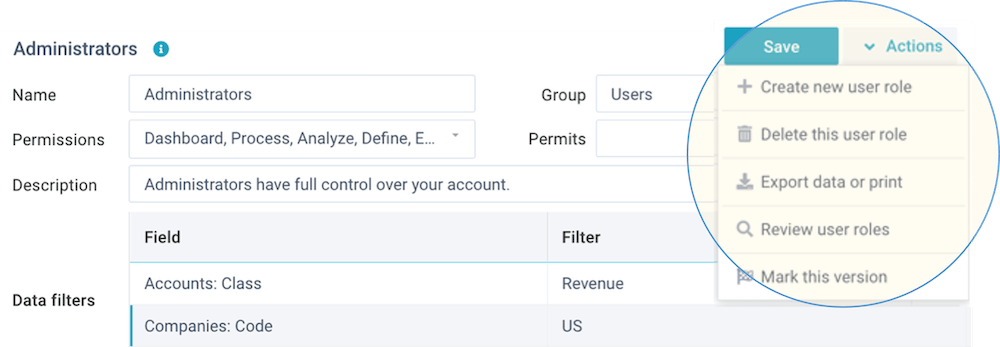
These buttons enable you to do the following:
- Save - save your changes (or Ctrl+S)
- Actions - open a dropdown menu with further options:
- Create a new user role (or copy one)
- Delete this user role
- Export data or print
- Review all roles
- Mark this version
Review all roles
Click on Actions - Review all roles to review the user roles and permissions that each user has been assigned:
- By user role - shows a list of all users and the user role(s) they each have been assigned.
- By permission - shows a list of all users with the underlying permissions they have, based on the user role(s) they have been assigned.
You can also watch the tutorial video.
